Training your chatbot is less about uploading everything and more about uploading the right things, structured correctly. A well-trained chatbot delivers accurate, on-brand answers. Before diving into detailed documents, there are a few essentials every chatbot should start with.
Step 1: Start With a Clear Project Description
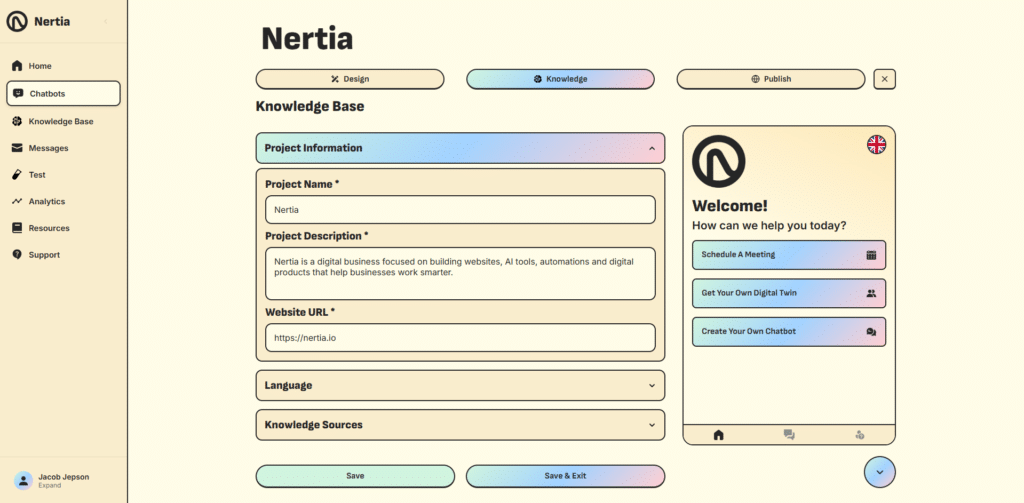
Begin by adding the basic information your chatbot needs to understand your business. Enter a clear project name, a short description of what your business does, and your website URL.
Your project description should explain:
- What your business offers
- Who your customers are
- The main services or products you provide
- How you would like the chatbot to support visitors
A focused description gives your chatbot useful context and helps it provide more accurate, relevant responses.
Step 2: Include a Link to Your Website
Adding a link to your website tells the chatbot that it is allowed to be used on that website. It essentially blocks other people from using the chatbot should they gain access to the code snippet.
The chatbot does not read information from the site—all training content should still come from your Knowledge Base.
Step 3: Upload Your Document to the Knowledge Base
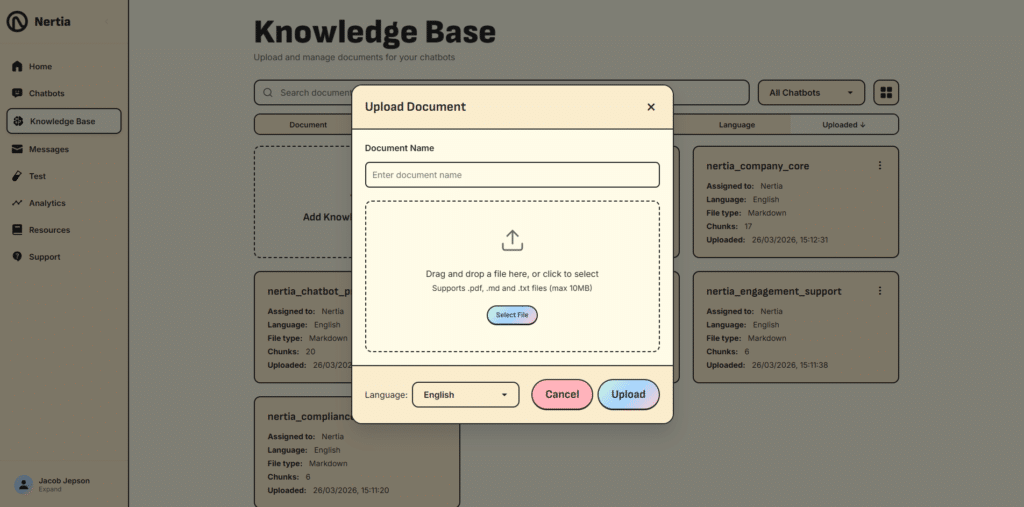
Give your document a clear, descriptive name so it can be easily identified and managed later. Then drag and drop your file into the upload area, or select it manually from your device.
The Knowledge Base supports PDF, Markdown and TXT files up to 10MB. Before uploading, select the document’s native language from the language dropdown. This tells the chatbot which language the content was originally written in, helping it interpret and process the information more accurately.
Once everything is ready, select Upload to add the document to your chatbot’s Knowledge Base. The chatbot can then use the uploaded information when answering relevant customer questions.
For example structures, see the knowledge base templates on the Resources page.
Step 4: Add Knowledge Source to Chatbot
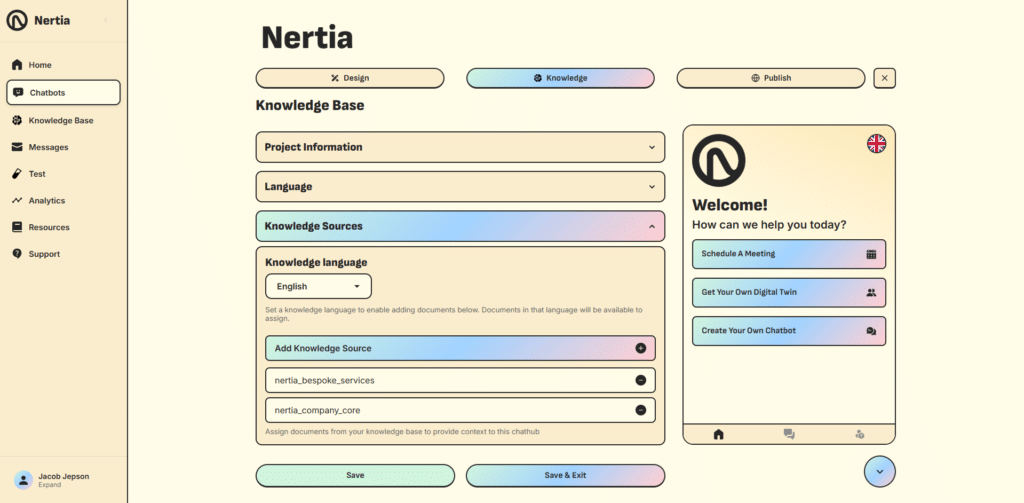
Open the Knowledge Sources section within your chatbot setup and select the language used by the documents you want to assign. This helps ensure that only compatible knowledge sources are shown.
Select Add Knowledge Source, then choose the relevant document from your Knowledge Base. Once added, the document will appear in the list of assigned sources.
Your chatbot will use the information contained in these documents to understand your business and answer related questions more accurately. You can assign multiple knowledge sources to give the chatbot access to different areas of your business, such as company information, services, policies and support guidance.
Use the minus icon beside a document to remove it from the chatbot when it is no longer required. When your sources have been added, select Save or Save & Exit to apply the changes.
That’s It. Your Chatbot Is Ready to Learn
Setting up your chatbot’s knowledge is that simple. Once your documents have been uploaded and assigned, your chatbot can use them to provide accurate, relevant answers based on your business information.
To create your own chatbot, log in to the Nertia platform, open Chatbots from the dashboard and select the option to create a new chatbot. From there, you can customise its design, add your knowledge sources, test its responses and publish it to your website when you are ready.